How to Choose a Trekking Backpack in India: The Ultimate Himalayan Rucksack Guide
My cheap, unbranded rucksack had completely collapsed under the weight, forcing my spine to bear the entire load.
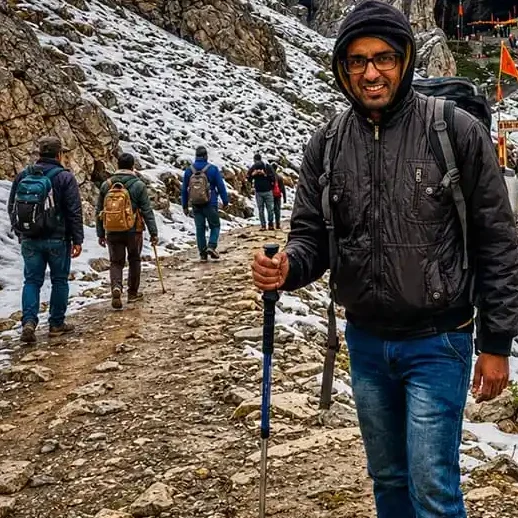
Later, while navigating the unpredictable, rocky terrain toward Amarnath, I watched fellow yatris and trekkers making the exact same mistake: adjusting their straps every ten minutes, visibly bruising their collarbones, and fighting their own gear instead of enjoying the journey.
When you are heading into the Himalayas, your rucksack is not just a bag—it is your literal home on the trail. It holds your shelter, your warmth, your food, and your safety kit. Buying a backpack based purely on a cheap online discount or choosing a cool color is the fastest way to ruin a trek.
Whether you are prepping for a quick weekend 5-day escape of Hampta Pass or packing for a grueling 10-day crossing of the Bali Pass, this comprehensive guide will help you choose the exact right rucksack for your body type, your budget, and your trail requirements.
Why Your Backpack Matters?
A trekking backpack isn’t simply a bag—it’s part of your gear system. Proper weight distribution reduces strain on the shoulders and transfers much of the load to the hips.
Research by Genitrini et al. (2022) highlights that backpack design and load distribution significantly affect comfort and physical performance during prolonged carrying.
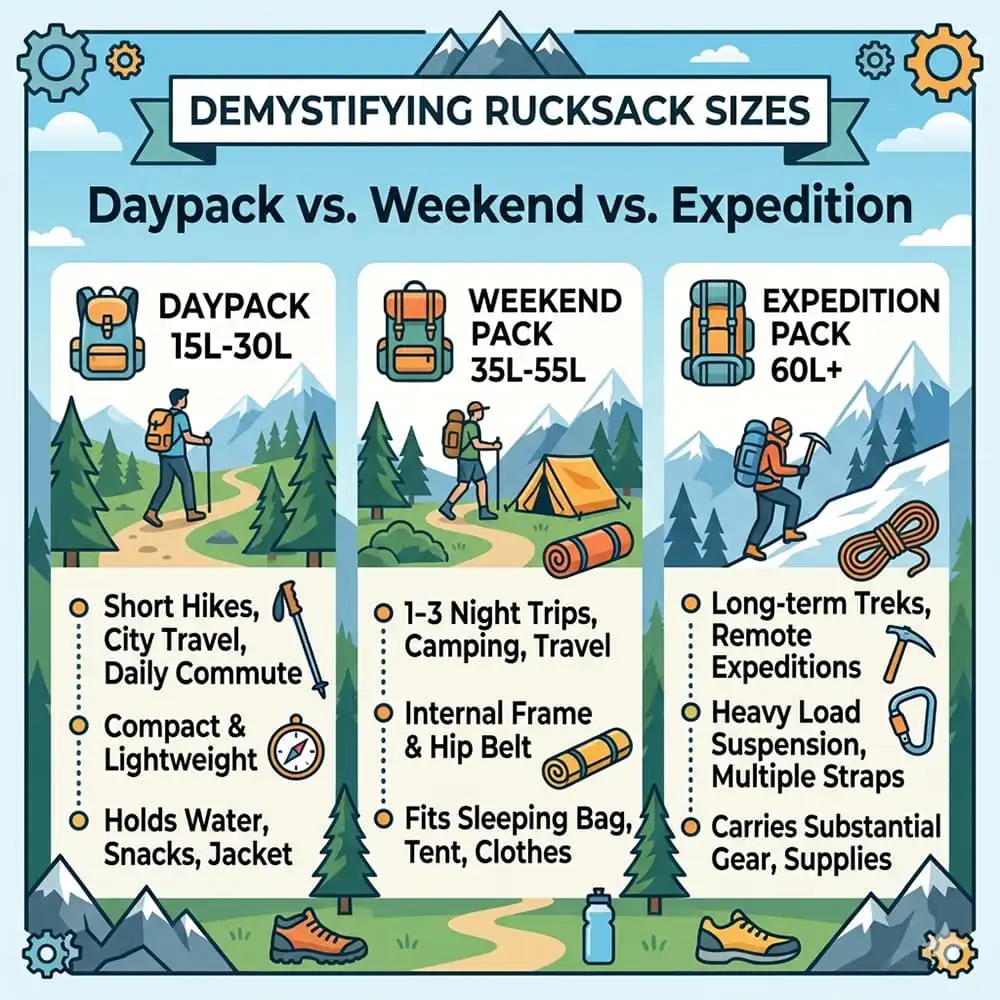
Demystifying Rucksack Sizes: Daypack vs. Weekend vs. Expedition
The most common question beginner trekkers ask is: “How many liters do I need?“
In the backpacking world, rucksack capacity is measured in liters (L), which indicates the total volume inside the bag’s compartments. Choosing the wrong volume means you will either be struggling to cram your winter layers inside or carrying a massive, sagging bag that compromises your balance.
Let’s break down the three primary backpack categories you will find in India and exactly when to use them.
The Daypack (20L – 30L)
A daypack is a compact, lightweight bag designed strictly for single-day hikes where you return to your base camp or hotel by evening.
- Best Used For: Weekend day-hikes like Nag Tibba, Triund, or Kheerganga. It is also the perfect size if you are doing a luxury teahouse trek (like the Everest Base Camp trek) where a porter or mule carries your primary duffel bag, and you only need to carry your personal items during the day.
- What Fits Inside: A 2-liter water bladder or bottle, a rain poncho, a light fleece layer, a headlamp, a basic personal first-aid kit, and your packed lunch or trail snacks.
- Pros: ✓ Lightweight, ✓ Easy to carry, ✓ Suitable for beginners
- Cons: ✗ Limited storage

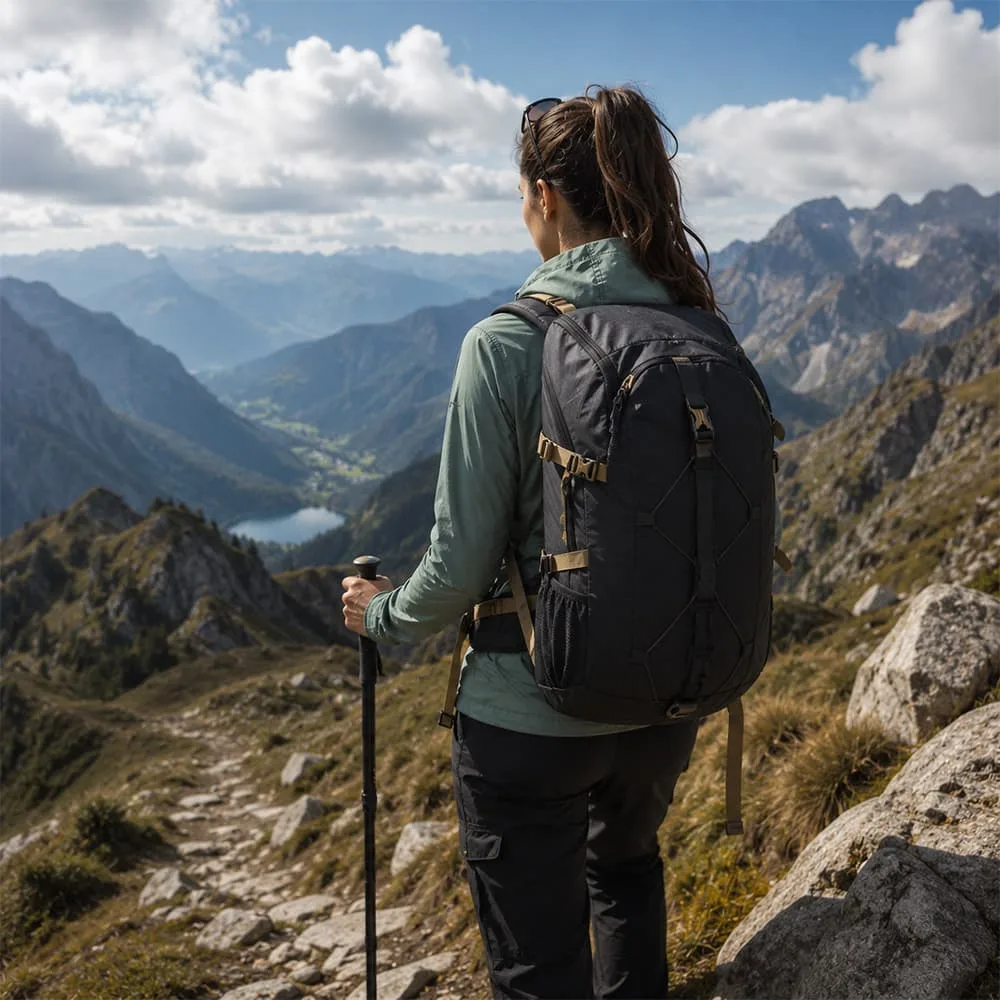
The Weekend Rucksack (40L – 50L)
The weekend pack is the sweet spot for short, fast, and light alpine trips. These packs are designed to carry enough gear for a couple of nights without becoming overly bulky.
- Best Used For: 2 to 4-day treks where you are staying in local homestays or using established campsites where heavy tents and cooking rations are already provided for you (such as a managed autumn trek to Har Ki Dun).
- What Fits Inside: A change of clothes, a compact sleeping liner, toiletries, a heavy down jacket, thermal innerwear, and essential electronics.
- Pros: ✓ Excellent balance between capacity and weight, ✓ Most versatile size
- Cons: ✗ Can become heavy if overpacked
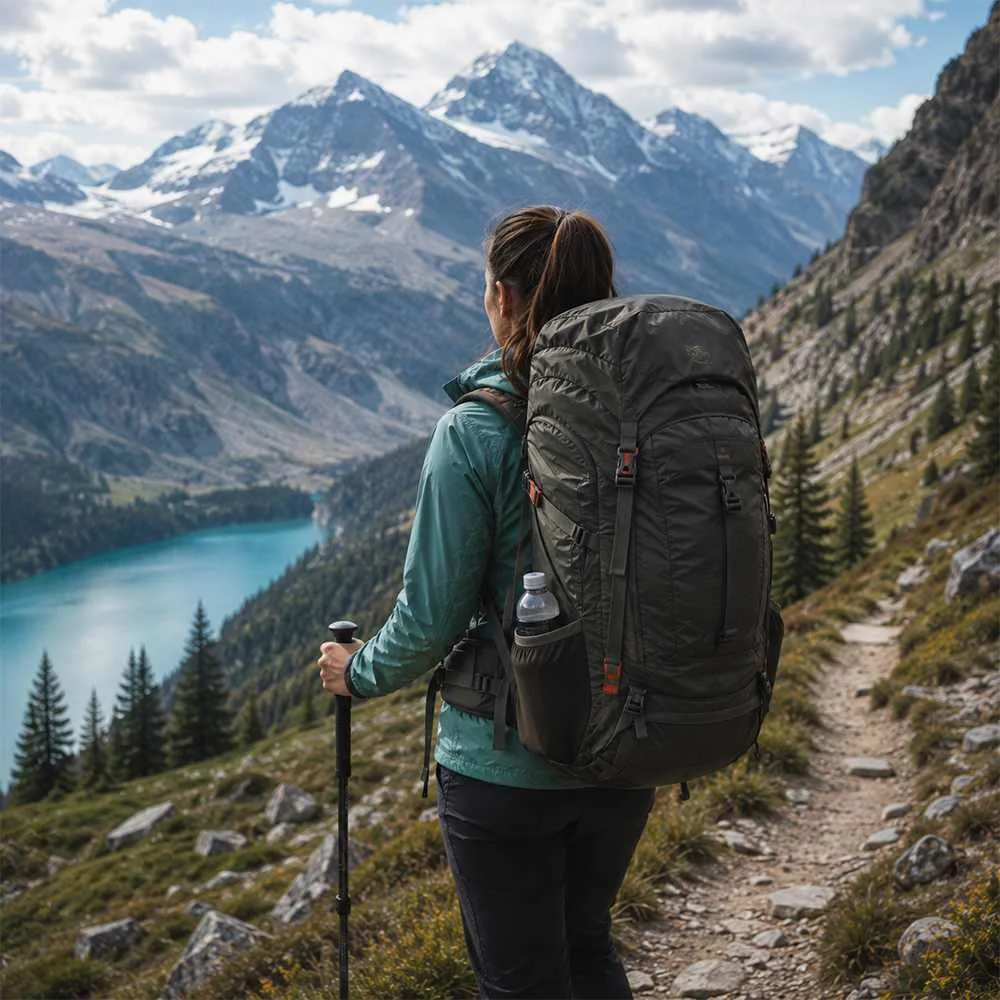
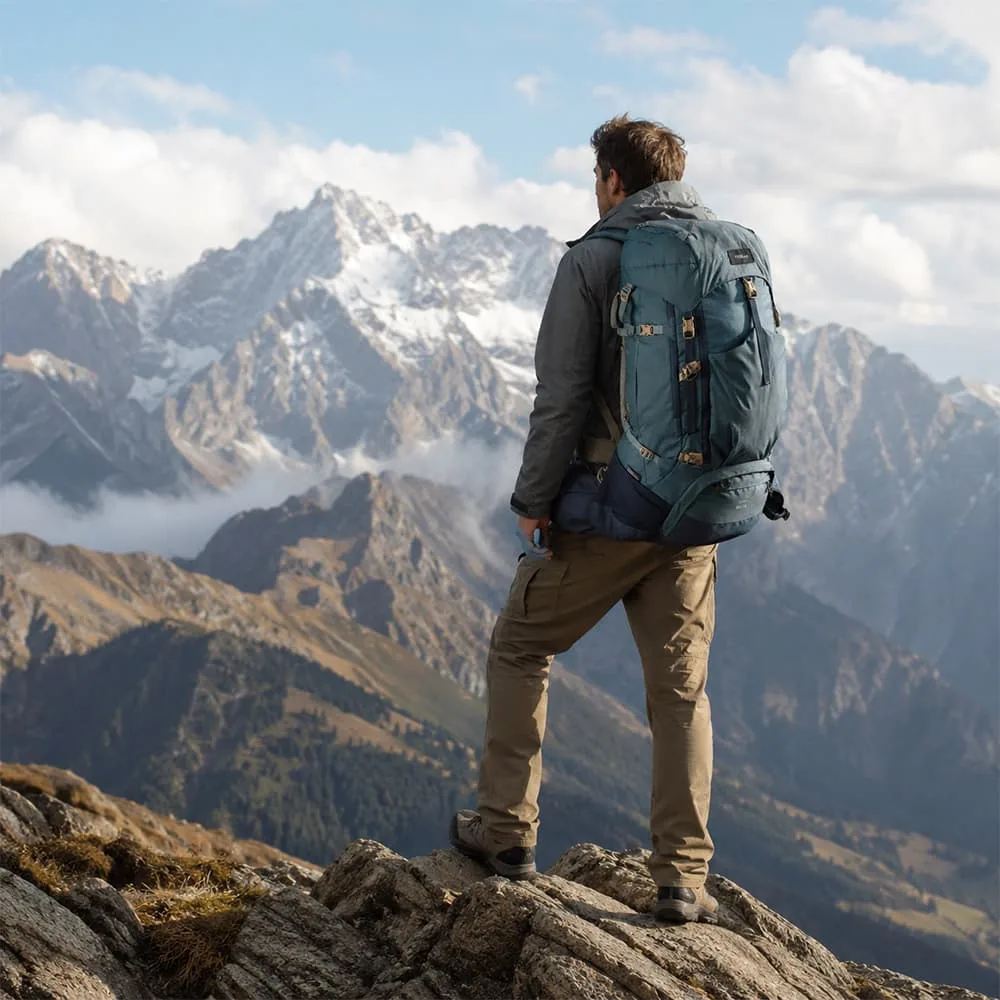
The Heavy-Duty Expedition Pack (60L – 75L)
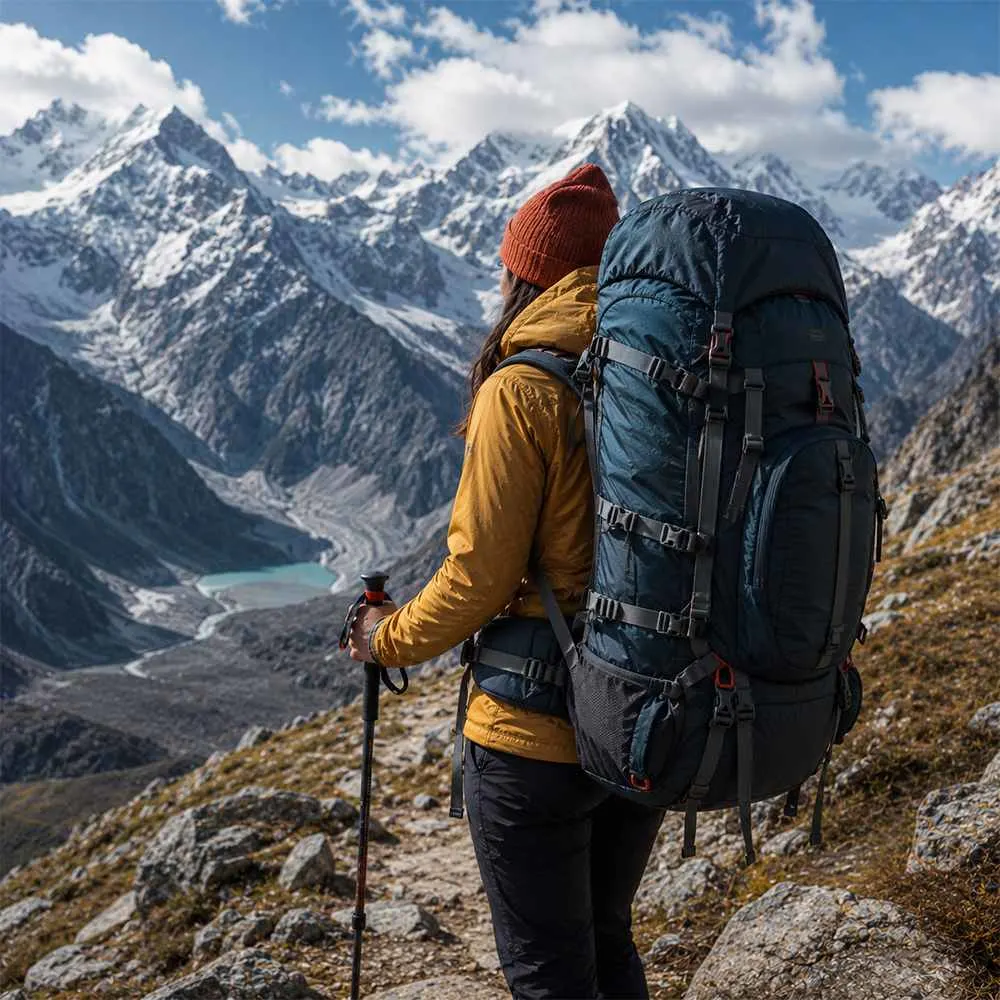
This is the classic “Himalayan Rucksack.” If you are heading out on a serious, high-altitude trail where external support is minimal, this is the beast you need.
- Best Used For: Self-sustained, multi-day Himalayan expeditions lasting 5 to 10 days (e.g., Roopkund, Kedartal, Pin Parvati, or the sub-zero Chadar Trek). If your trekking agency requires you to carry your own personal clothing, sleeping bag, and sleeping mat, you automatically fall into this category.
- What Fits Inside: A heavy 4-season sleeping bag, a sub-zero down jacket, multiple layers of warm clothing, a compact camping stove, fuel cylinders, dried rations, and a portion of a shared tent frame.
- Pros: ✓ Massive capacity, ✓ Designed for heavy loads
- Cons: ✗ Bulkier and heavier
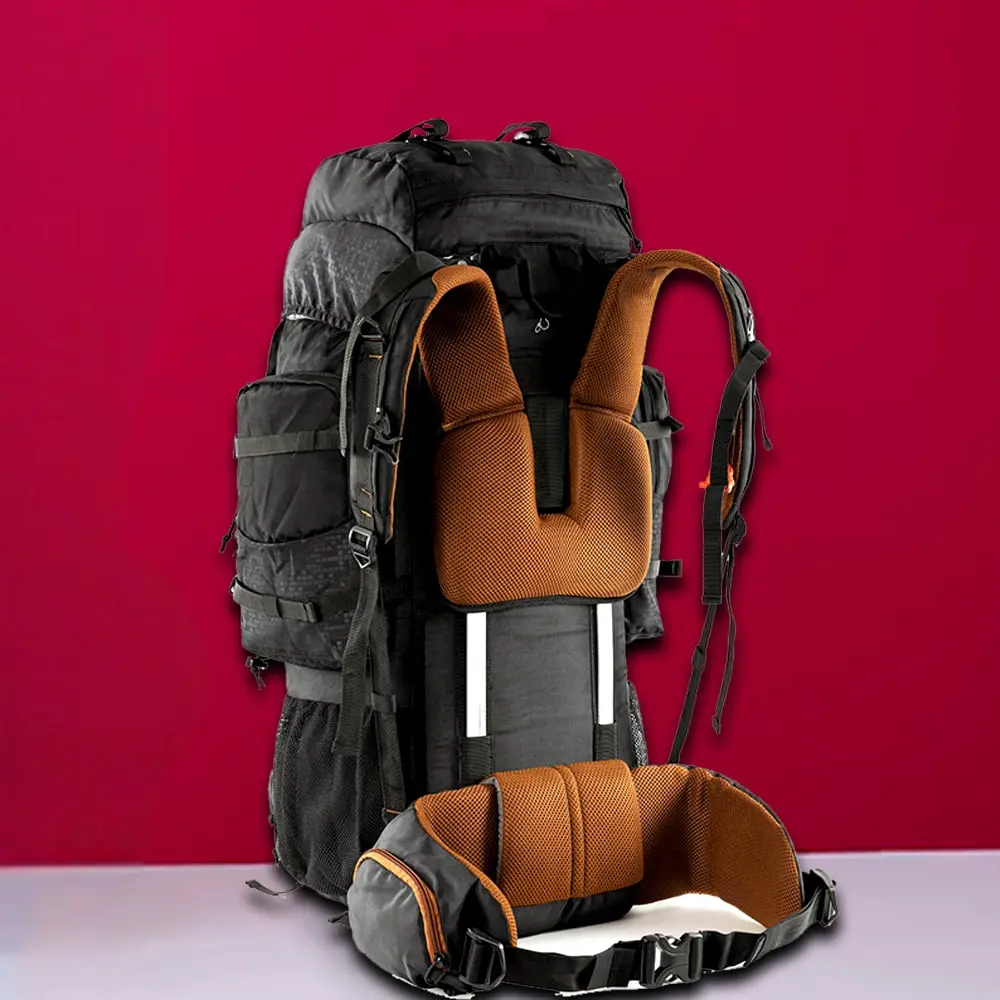
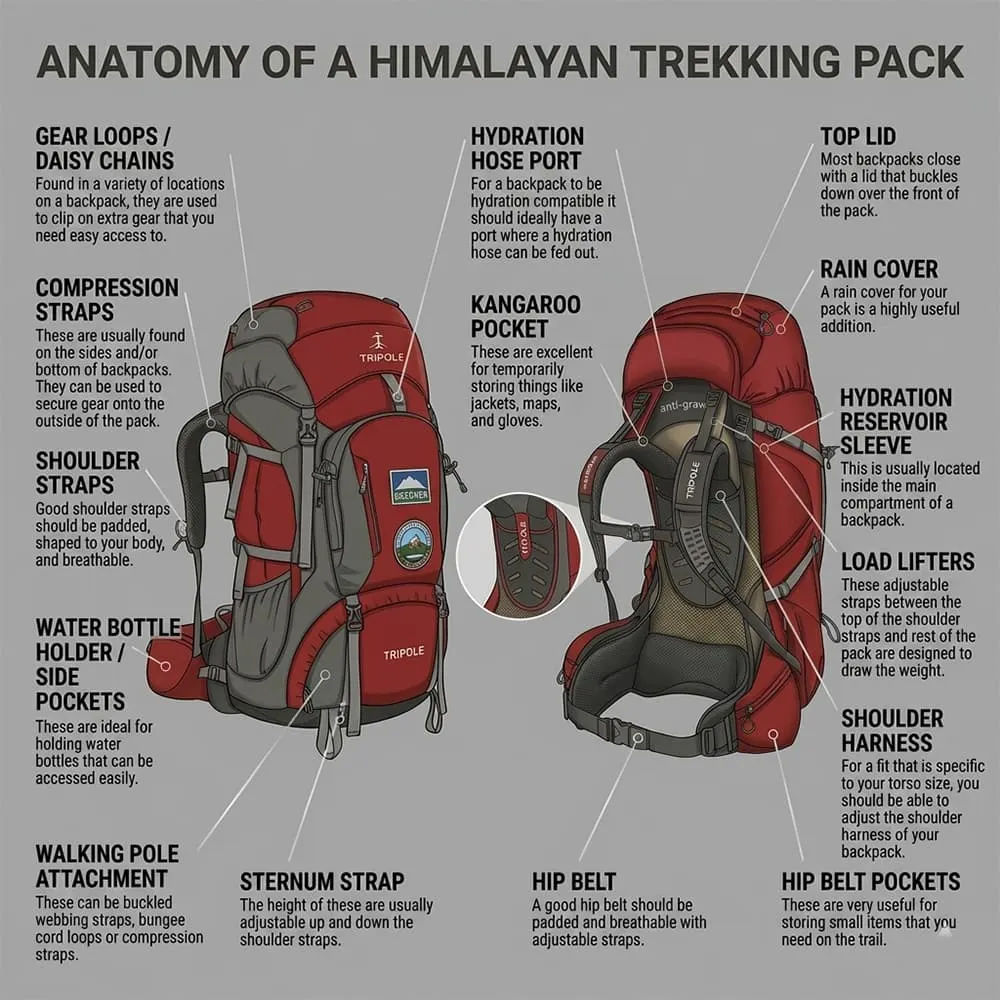
The Anatomy of Comfort: Core Technical Features Explained
If you look at a premium rucksack, it looks like a complex web of straps, buckles, and hidden frames. This is not for aesthetics—it is pure mechanical engineering designed to save your spine.
To choose a pack that feels weightless on the trail, you need to understand how these core technical features work together to manipulate gravity.
Internal vs. External Frames
Every rucksack needs a spine of its own to hold shape and transfer weight.
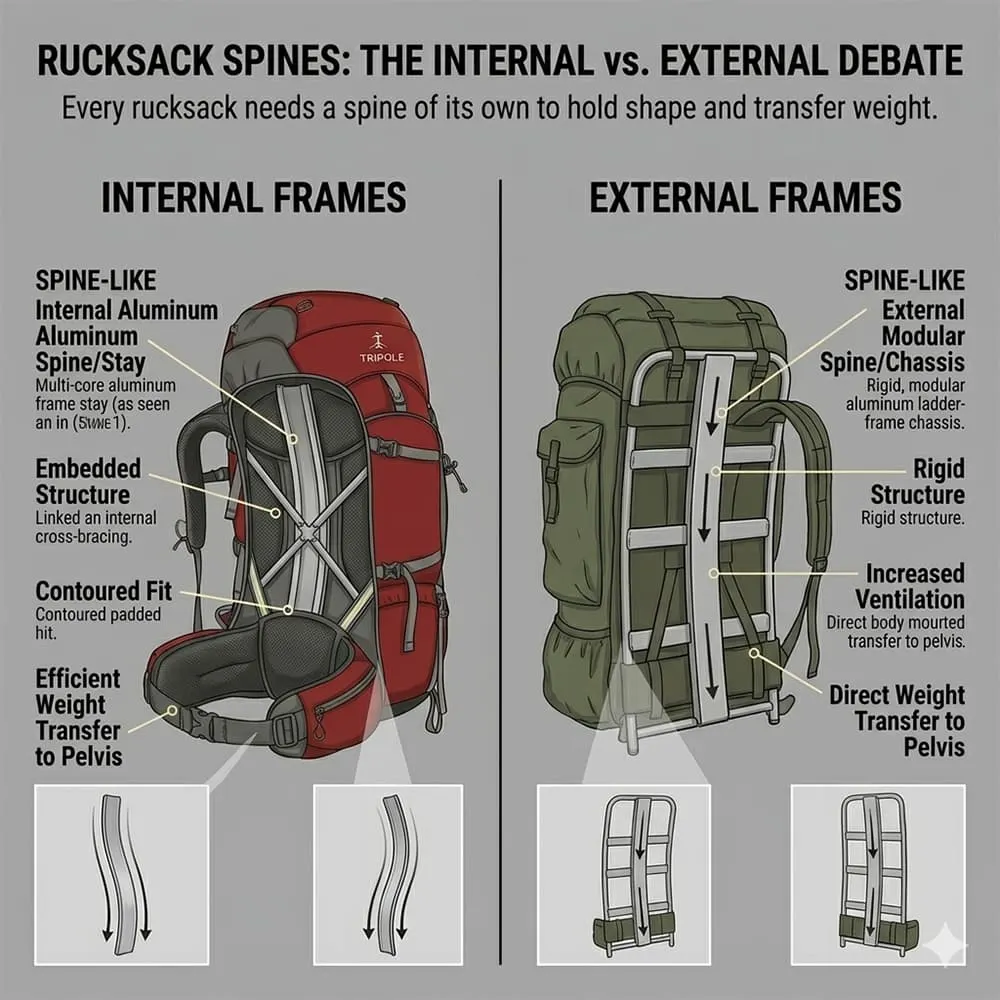
Internal Aluminum Frames: Nearly all modern technical rucksacks use internal frames. These consist of hidden, lightweight aluminum stays (flat bars) or a framesheet built directly into the back panel. They are engineered to mimic the natural $S$-curve of your spine. This keeps the pack’s center of gravity tight against your back, giving you maximum balance on rocky moraines, scree slopes, and narrow ledge trails common in the Himalayas.
Advantages
- Better stability
- Keeps the load close to the body
- More comfortable on uneven terrain
- Ideal for Himalayan trekking
Recommended For: Almost all Indian trekkers.
External Frames: These feature a visible, rigid outer structure (usually heavy aluminum tubing). While great for carrying massive, boxy, flat-trail loads, they are entirely unsuited for technical mountain trekking because they cause the pack to sway, easily throwing you off balance on steep ridges. Stick strictly to internal frames.
Advantages
- Higher load capacity
- Better ventilation
Disadvantages
- Less stable
- Bulky
- Difficult to maneuver
Recommended For: Heavy loads and specialized expeditions.
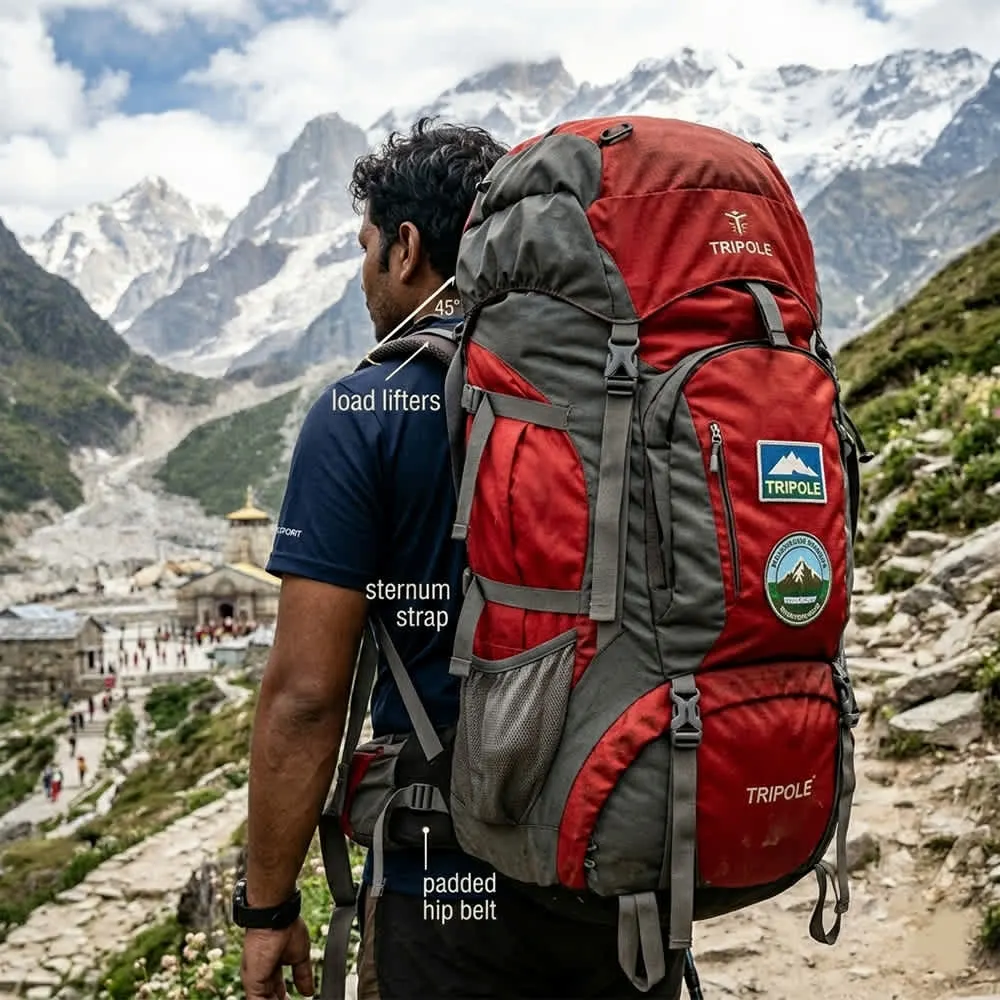
The Hip Belt: Your Primary Weight Carrier
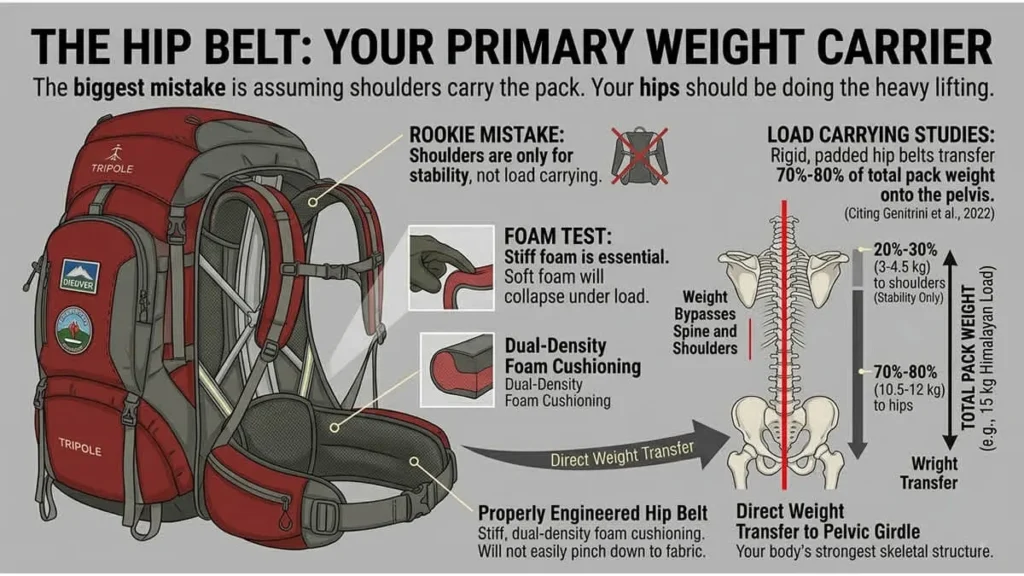
The biggest rookie mistake is assuming that your shoulders are supposed to carry the weight of your pack. They aren’t. Your shoulders merely keep the pack upright; your hips should be doing the heavy lifting.
According to ergonomic load-carrying studies (such as Genitrini et al., 2022), a properly engineered, rigid, and heavily padded hip belt transfers up to 70% to 80% of the total pack weight directly onto your pelvic girdle—the strongest skeletal structure in your lower body.
By grounding the weight on your hips, you completely bypass your spine and shoulder muscles. Look for a hip belt with stiff, dual-density foam cushioning. If you can easily pinch the hip belt foam down to the fabric with your fingers, it is too soft and will collapse under a real 15 kg Himalayan load, causing pain and bruising.
A Good Hip Belt Should Have
✓ Thick padding
✓ Adjustable straps
✓ Wide surface area
✓ Secure buckle
Avoid thin belts that place excessive stress on the shoulders.
The Micro-Adjusters: Load Lifters & Sternum Straps
Once the hip belt anchors the weight, a network of specialized straps stabilizes the load.
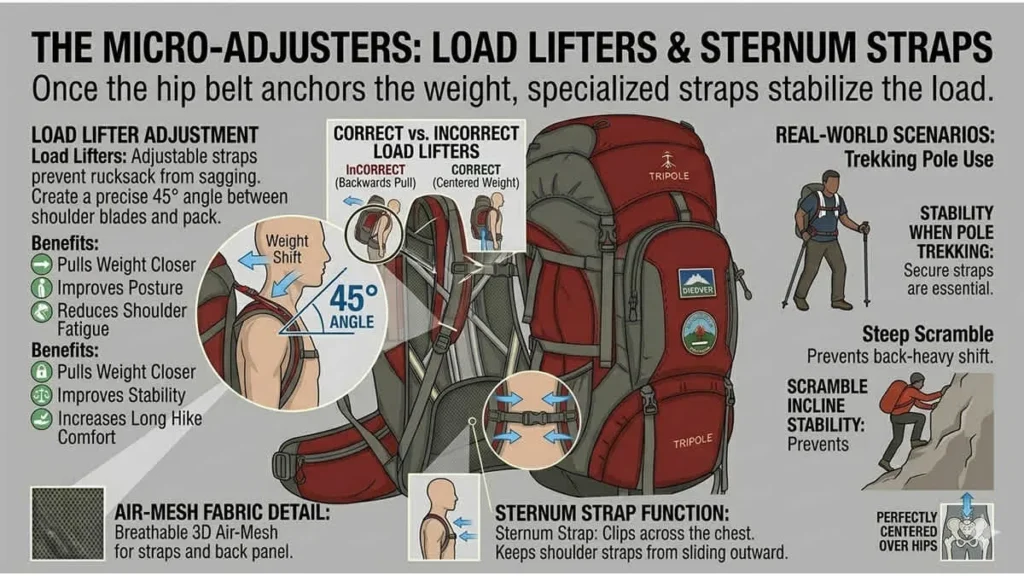
Load Lifters: These are the small, adjustable straps connecting the top of your shoulder harness to the upper frame of the pack. When pulled, they prevent the rucksack from sagging away from your body. For optimal ergonomics, load lifters should form a 45-degree angle between your shoulder blades and the pack body. Tightening them shifts the upper weight forward, centering it perfectly over your hips.
Benefits
- Pull the weight closer to your body.
- Improve posture.
- Reduce shoulder fatigue.
Without properly adjusted load lifters, the backpack tends to pull backward.
Sternum Straps: This small strap clips across your chest. Its primary job is not to bear weight, but to keep the shoulder straps pulled inward so they don’t slide off your shoulders when you are using trekking poles or scrambling up a steep incline.
Benefits
- Prevents straps from sliding.
- Improves stability.
- Increases comfort during long hikes.
Ventilation & Back Panel Mesh
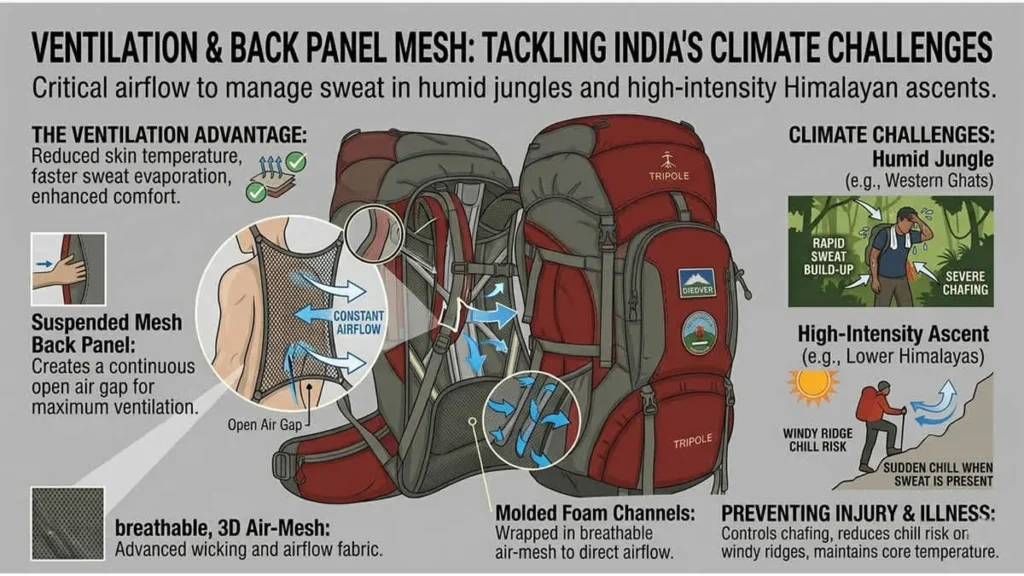
Trekking in India presents unique climate challenges. You could be trekking through a humid, sweaty jungle in the Western Ghats or making a high-intensity ascent in the hot afternoon sun of the lower Himalayas.
Without proper ventilation, sweat builds up rapidly against your back, causing severe chafing and increasing your risk of catching a chill when you reach a windy ridge. Look for packs featuring suspended mesh back panels (which create an open air gap between your back and the bag) or molded foam channels wrapped in breathable air-mesh to allow constant airflow.
The Indian Body Variant: Mastering Torso Length Adjustments
Walk into any outdoor retailer or browse an online store, and you will notice that a vast majority of technical outdoor gear is built using Western sizing standards. This creates a hidden pitfall for Indian trekkers.
When it comes to buying a rucksack, your total height is a lie.
The Regional Height & Proportions Challenge
India has an incredibly diverse genetic landscape. An average trekker from Punjab may have a completely different height, bone structure, and torso-to-leg ratio compared to a trekker from Kerala or West Bengal.
If you buy a high-end, fixed-frame European or American imported pack, it is mathematically optimized for a different population average. If a pack’s frame is too long for your torso, the hip belt will sit too low on your thighs, restricting your stride on steep ascents. If the frame is too short, the hip belt will wrap around your belly button, transferring 100% of the agonizing weight back onto your shoulders.
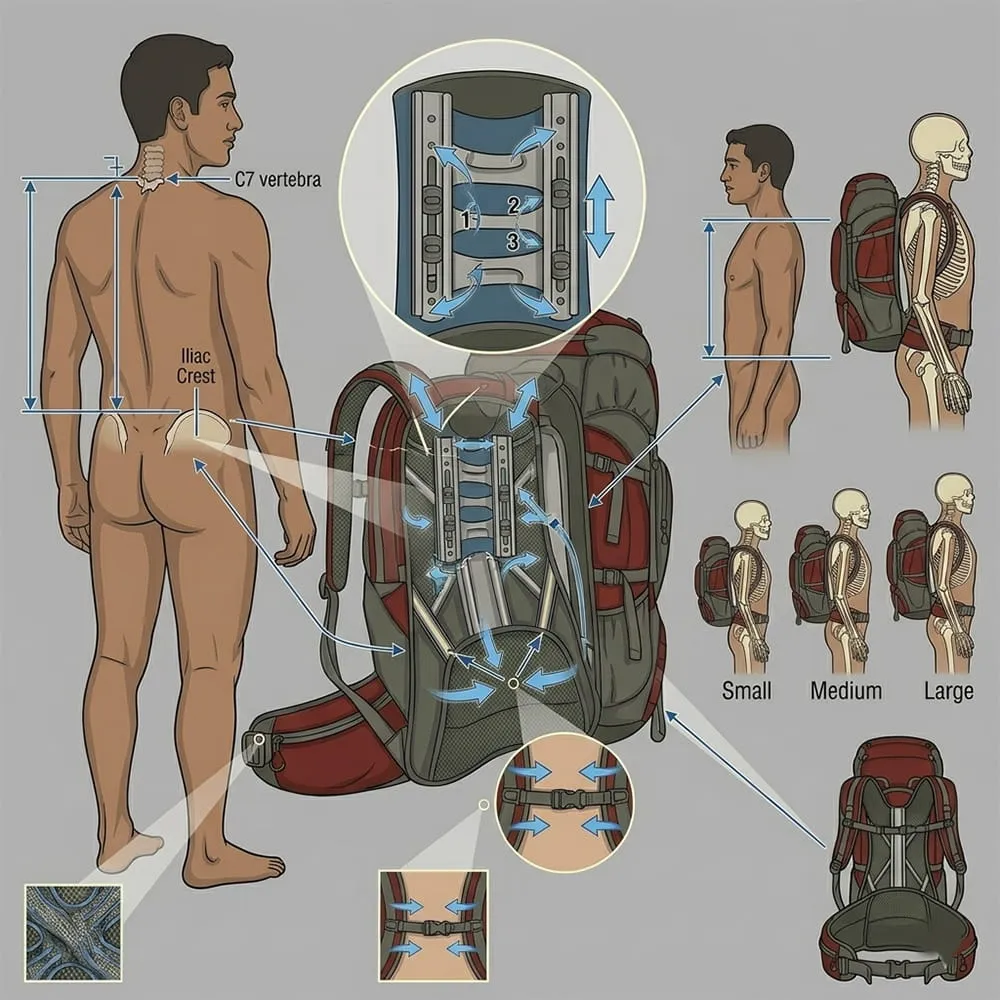
How to Measure Torso Length
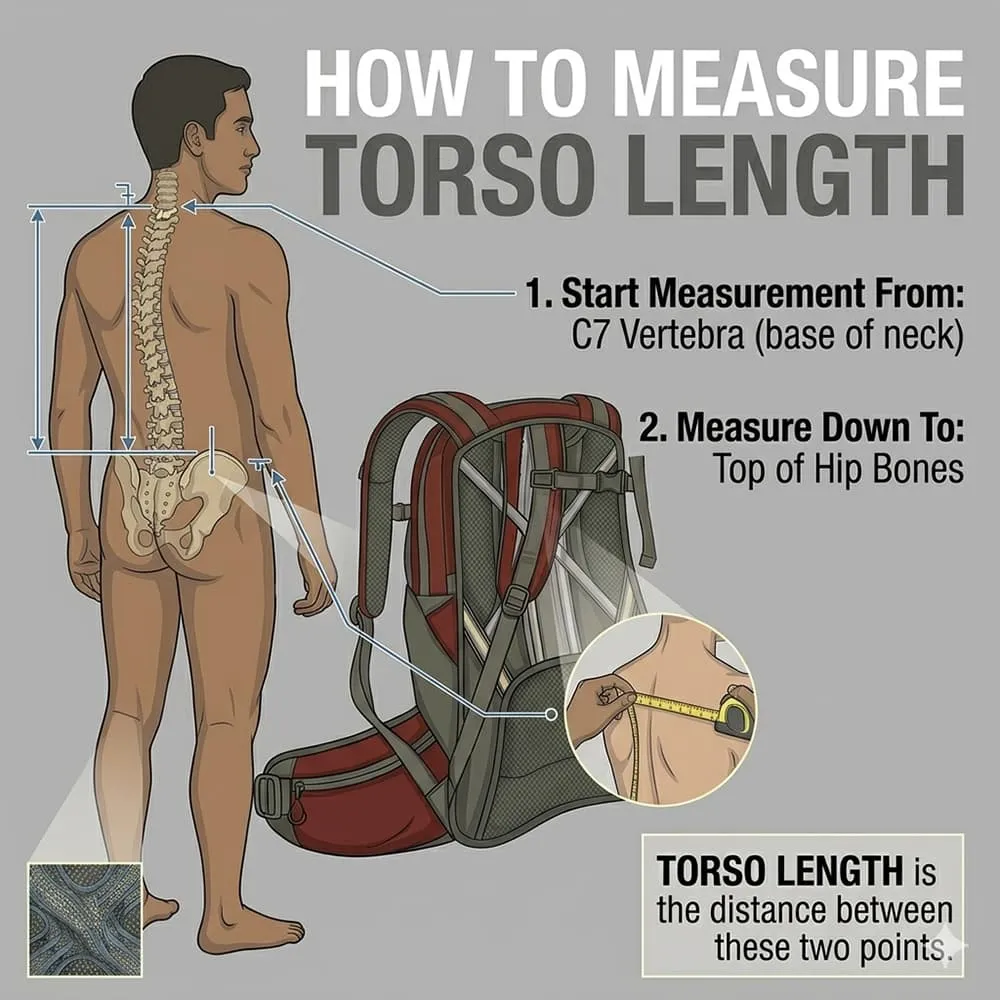
Measure from:
- The C7 vertebra (base of your neck)
- To the top of your hip bones
General Guidelines
| Torso Length | Size |
| 15–17 inches | Small |
| 17–19 inches | Medium |
| 19–21 inches | Large |
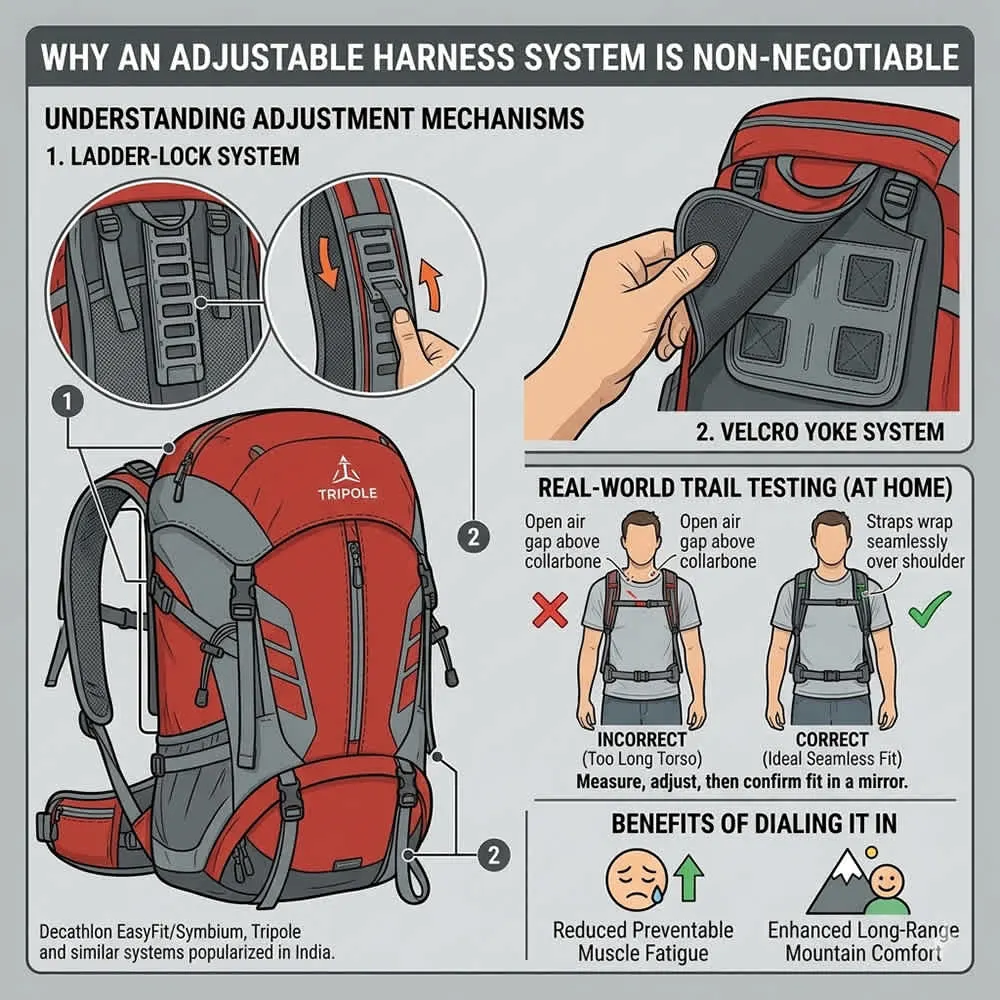
Why an Adjustable Harness System is Non-Negotiable
To combat this body type variance, you should almost always look for a rucksack with an adjustable harness system (often referred to as a ladder-lock, Velcro yoke, or sliding back panel).
Brands like Decathlon (with their EasyFit or Symbium back panels) and Tripole have popularized these adjusters in India. They allow you to physically un-velcro or un-clip the entire shoulder strap assembly and slide it up or down the frame to match your exact skeletal dimensions.
Real-World Trail Testing
Before you commit to keeping your rucksack, try this quick test at home:
- Adjust the back panel to what you think is your size.
- Put on the pack with some weight inside using the bottom-to-top sequence we detailed earlier.
- Look in a mirror from the side.
The shoulder straps should wrap seamlessly over the top of your shoulders without leaving an open air gap above your collarbone. If there is a gap, the torso setting is too long. If the straps wrap tightly down your back and squeeze your shoulder blades painfully inward, the torso setting is too short.
Taking twenty minutes to dial in this adjustment at home will save you five days of intense, preventable muscle fatigue in the mountains.
The Golden Rules of Packing: Gravity Distribution
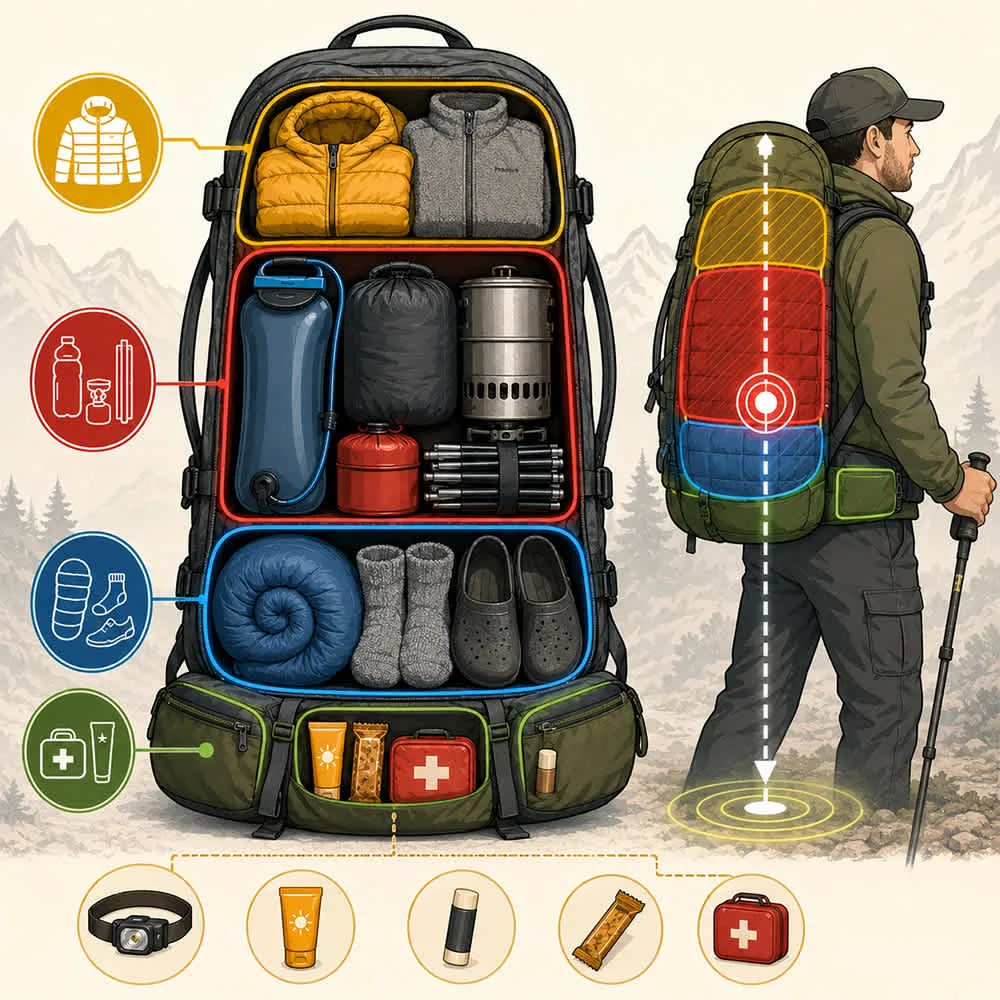
How you organize your gear inside the pack determines how heavy it feels on your feet. Never pack at random. Use the strategic “zone packing” method to balance your center of gravity:
- The Bottom Zone (Light/Bulky): Put your sleeping bag, extra pairs of woolen socks, and camp shoes down here. This creates a stable base and doesn’t push down hard on your lower back.
- The Core Zone (Heavy Objects): Place your heaviest items—like packed rations, water bladders, tent poles, or cooking stoves—closest to your spine in the middle of the pack. If you place heavy items on the outer edge, the pack will constantly pull you backward.
- The Top Zone (Medium/Bulky): Pack your fleece liners, down jacket, and heavy insulation layers here. You want them easily accessible if the wind picks up, and their medium weight keeps the bag upright.
- Accessory Pockets (Quick Access): Reserve the top flap (the pack’s “brain”) and hip belt pockets for your headlamp, sunscreen, lip balm, energy bars, and first-aid kit.
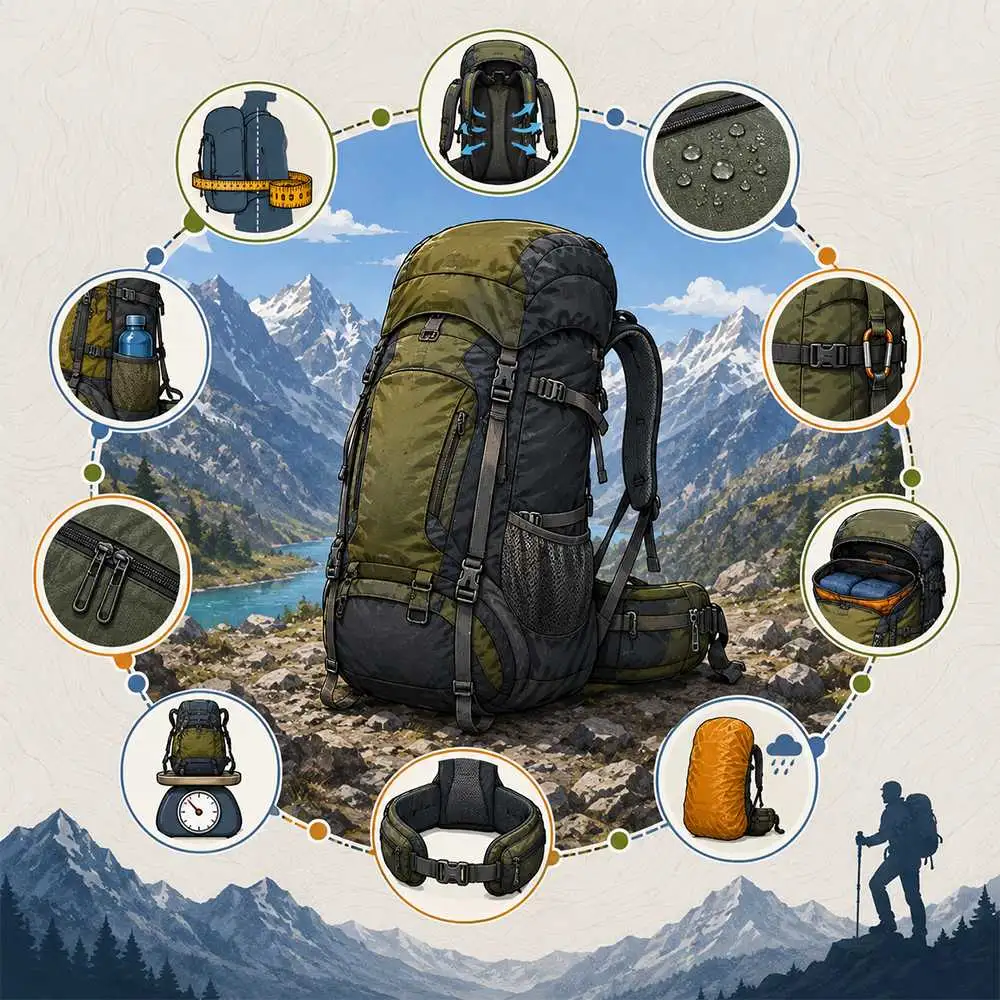
Rucksack Features That Make or Break a Himalayan Trek
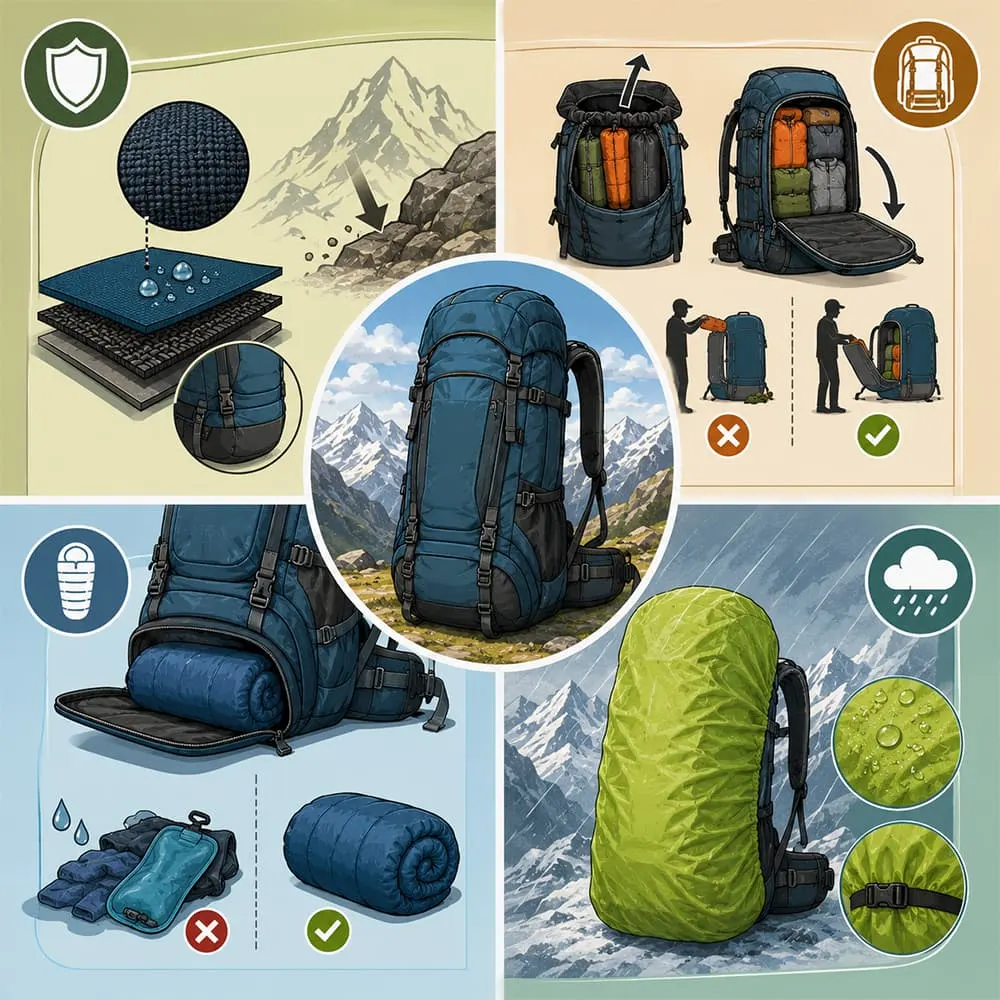
When you are thousands of meters above sea level, far away from cellular networks and retail stores, a broken zipper or a torn base fabric isn’t just an inconvenience—it is a gear emergency. Beyond the fit, look out for these four critical trail-tested features before making your purchase.
Material Durability: The Denier (D) Rating
Denier is the unit of measurement used to determine the textile thickness of individual threads in a fabric. The higher the denier, the thicker and more tear-resistant the material.
- What you need: Look for rucksacks that utilize at least 400D to 600D Nylon or Cordura, especially on the bottom panel of the bag.
- The Indian Transit Factor: Your bag won’t just face rocks on the trail; it will be thrown onto the roofs of rugged state transport buses, crammed into shared luxury travelers, dragged across concrete railway platforms, and strapped onto the backs of stubborn pack mules. Fragile, ultralight materials will shred under this treatment.
Accessibility: Entry Points Matter
- Top-Loading Packs: Classic rucksacks feature a single top drawstring under a floating lid. While excellent for packing efficiency and weatherproofing, retrieving a rain jacket or an extra fleece from the very bottom of a packed 65L bag means pulling out everything you own.
- Front-Loading or Panel Access: Look for packs that feature a large U-shaped front zipper (similar to a suitcase). This allows you to lay the pack flat at camp and instantly access items at the center or bottom without disrupting the rest of your organization.
Dedicated Sleeping Bag Compartment
A specialized zippered pocket at the very base of the pack is essential. Because you only pull out your sleeping bag once you reach your destination tent at night, keeping it separate means it acts as a structured cushion at the base of your pack during the day. More importantly, it keeps your absolute most critical sleep-gear completely isolated from leaky water bladders or damp, sweaty rain gear stored higher up in the main compartment.
Integrated Rain Covers
The weather in the Himalayas is notoriously unpredictable. A sunny morning at Chopta can transform into a torrential downpour or a wet snow flurry by early afternoon. Ensure your rucksack comes with a dedicated, high-visibility, waterproof rain cover that clips or tightens securely around the back.
Pro Tip: Ensure the cover has a drainage grommet hole at the bottom so water doesn’t pool inside the base fabric during long, exposed mountain rainstorms.
Top 3 Trekking Rucksack Brands in India: A Comparative Review
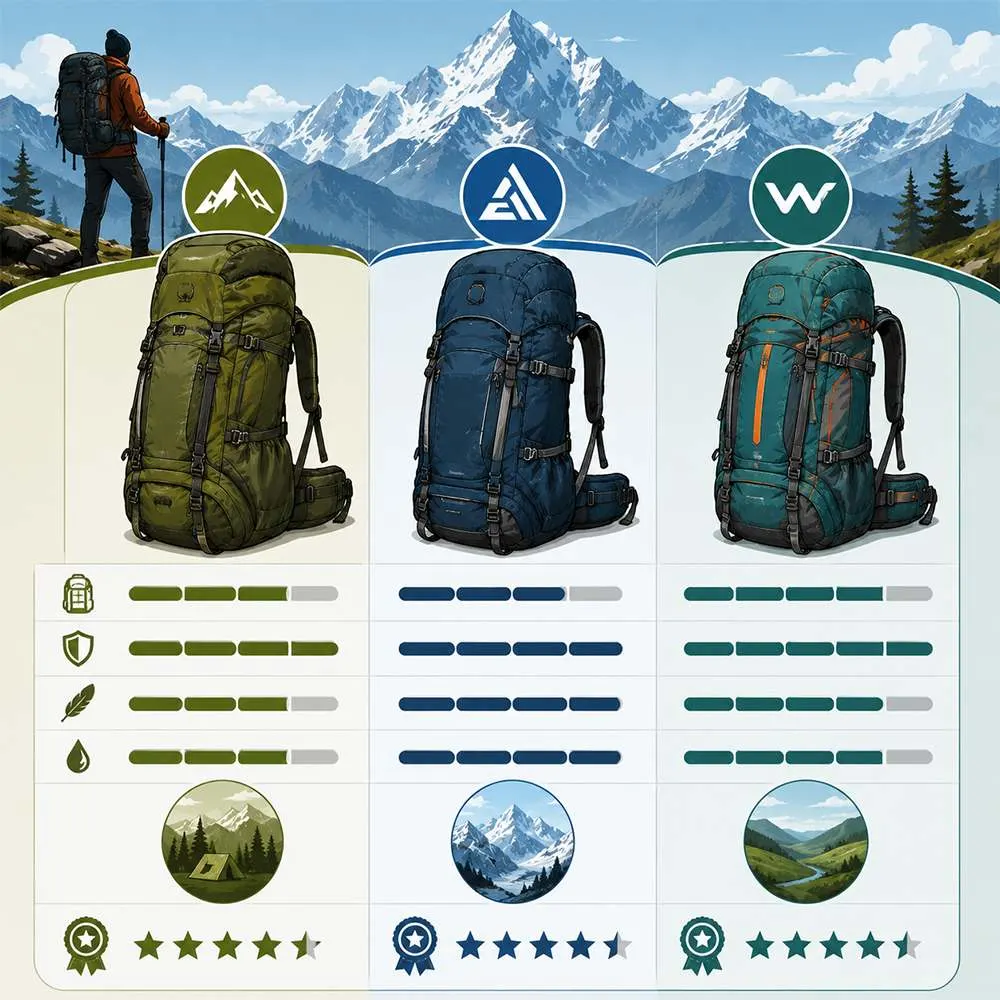
The Indian outdoor market features dozens of gear brands, but three giants dominate the landscape across various price brackets. Here is an honest, objective breakdown of how they compare against each other.
The Global Value King
Decathlon Forclaz
Decathlon’s Forclaz lineup is the undisputed benchmark for Indian trekkers, ranging from absolute beginners to advanced high-altitude guides.
Best For: Beginners to Intermediate multi-day trekkers
- The Pros: Their signature selling point is an unbeatable 10-year warranty against manufacturing defects. Models like the MT100 or MT500 Air feature highly intuitive, velcro-based torso adjustment indicators and rugged, trail-tested buckle hardware.
- The Cons: Because they are incredibly popular, you will see dozens of people carrying the exact same bag at every single campsite. They also tend to favor slightly stiffer, heavier foam padding on entry-level models to ensure long-term durability.
The Homegrown Structural Specialist
Tripole Colonel Series
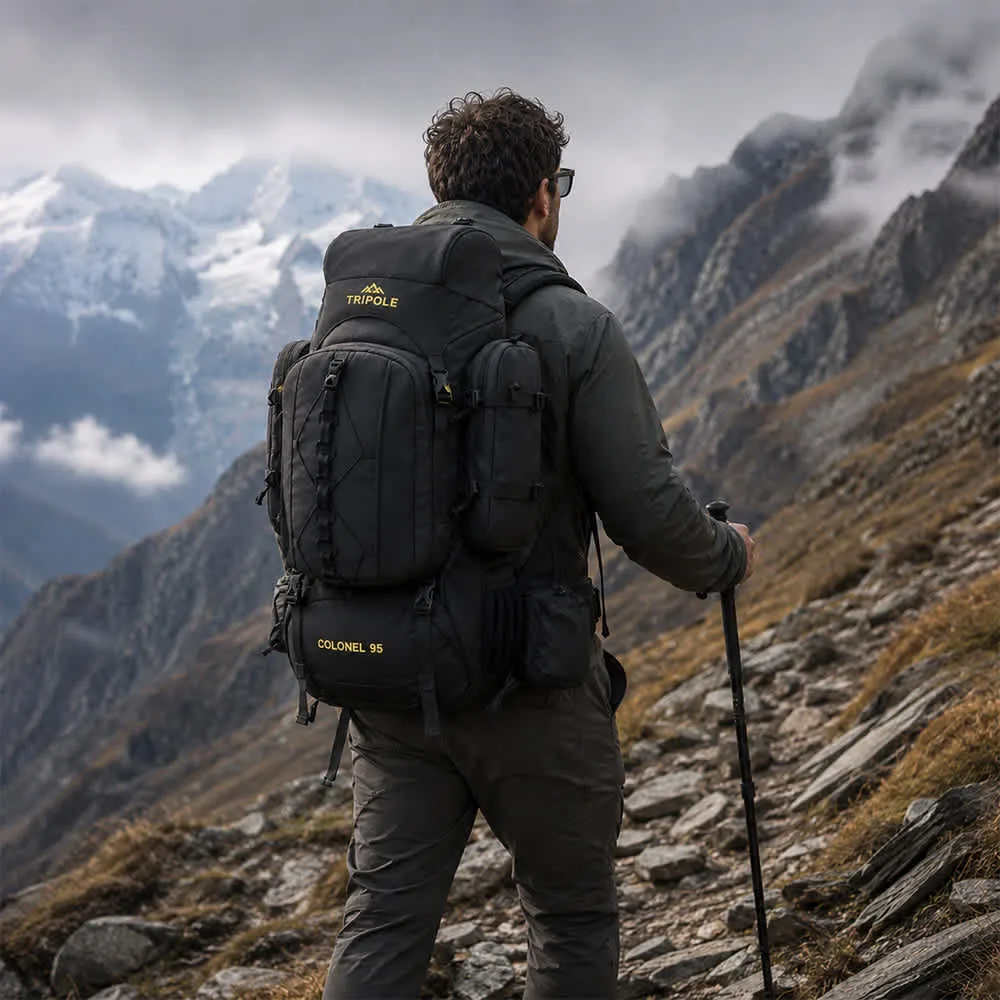
Tripole is a specialized Indian outdoor brand that has gained massive traction by designing gear specifically for the unforgiving conditions of Indian trekking terrain and local body types.
Best For: High-volume, self-sustained Himalayan expeditions
- The Pros: Tripole packs (like the Colonel series) are heavily reinforced with thick internal aluminum frames explicitly built to handle heavy, dense loads. They maximize storage capacity with highly practical external attachment points for ice axes, carabiners, and sleeping mats. Their price-to-performance ratio is exceptionally high.
- The Cons: Their aesthetics lean heavily toward rugged, military-inspired utility rather than sleek, modern alpine designs. They also feature fewer specialized, ultra-breathable suspended mesh back panels for hot-weather trekking.
The Legacy Rugged Contender
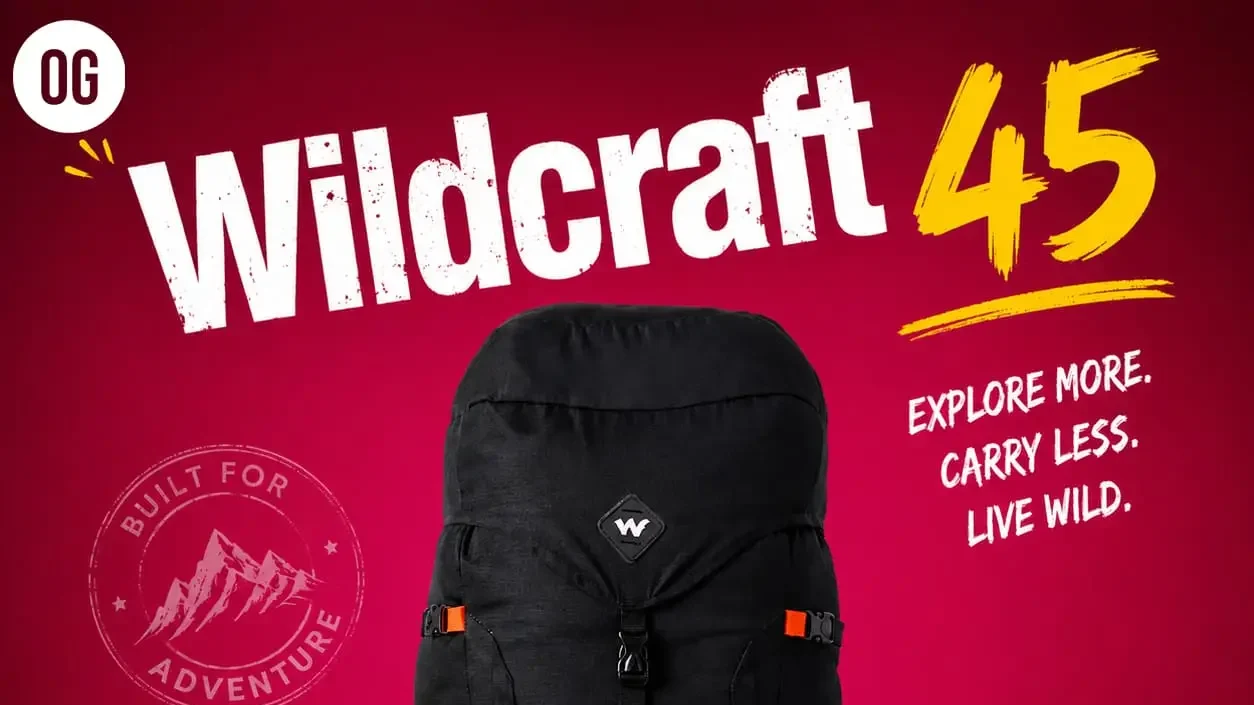
Wildcraft Trek Series
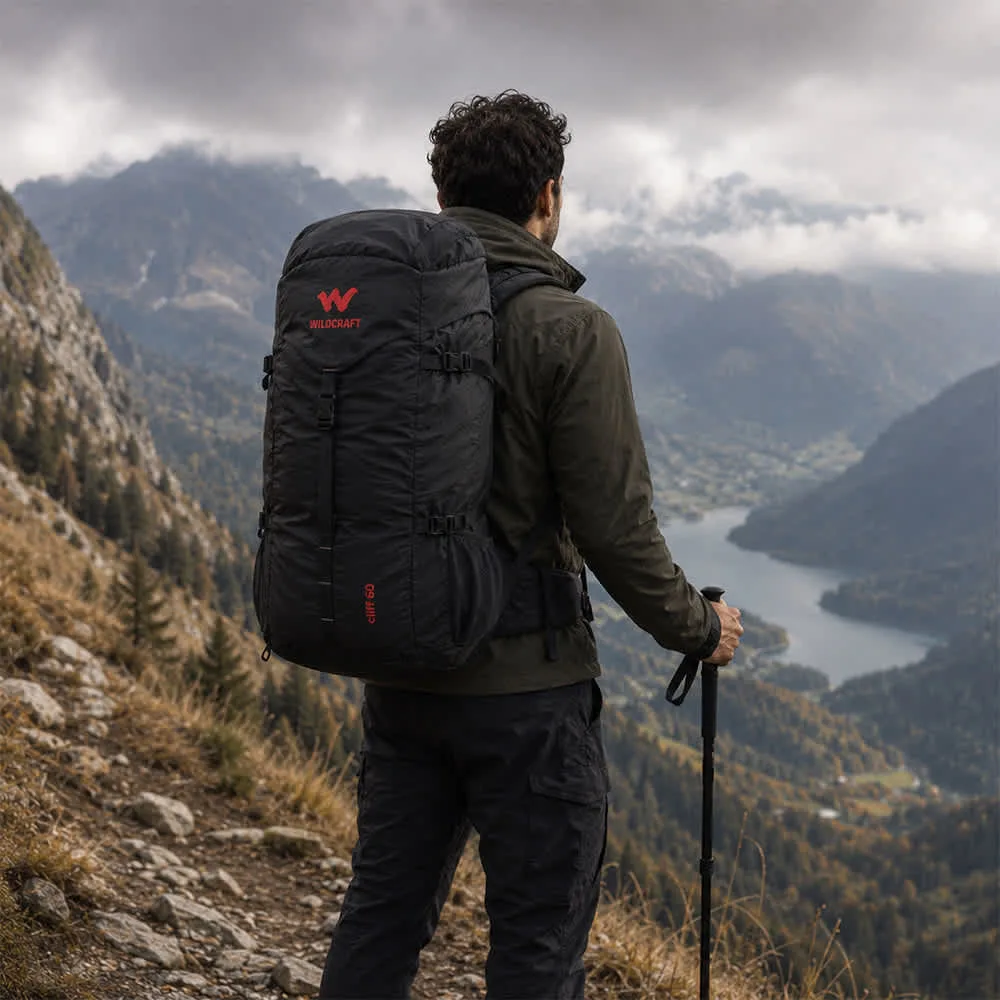
Wildcraft is one of India’s oldest homegrown outdoor brands, widely accessible across thousands of retail outlets nationwide.
Best For: Occasional trekkers, rough transit, and travel hybrids
- The Pros: Wildcraft excels at material luxury. They utilize highly abrasion-resistant, proprietary fabrics that handle intense wear and tear effortlessly. Their padding systems are notoriously plush, offering a soft, comfortable “out-of-the-box” feeling right from Day 1.
- The Cons: Many of Wildcraft’s mid-tier rucksacks rely on fixed back-panels rather than fully granular, adjustable torso ladders. This makes finding a perfectly dialed-in anatomical fit a bit more challenging for individuals with highly unique body proportions.
The Ultimate Rucksack Buying Checklist
Before you add a rucksack to your cart or head to the billing counter, run through this quick checklist to ensure you aren’t leaving your trail comfort to chance:
- Torso Check: Have you measured your C7-to-Iliac Crest length and matched it to the bag’s specifications?
- Harness Type: If buying online without trying it on, does the rucksack feature an adjustable velcro or ladder-lock harness?
- Hip Belt Test: Is the foam padding on the hip belt thick and firm enough that it doesn’t collapse completely when squeezed?
- Rain Readiness: Does the pack include a built-in rain cover, or do you need to purchase an external one separately?
- Fabric Denier: Is the base fabric rated at 400D or higher to survive rough transit and rocky campsites?
- Access Points: Does the pack offer front-panel (suitcase-style) zip entry, or are you comfortable unpacking everything from a top-loading design?
Conclusion: Invest in Your Spine

At the end of the day, a high-quality rucksack is not a luxury—it is an investment in your safety, your physical health, and your overall enjoyment of the outdoors. The Himalayas will challenge your physical limits; don’t let a poorly fitting backpack make that challenge an agonizing injury.
By prioritizing your anatomical torso fit, looking for heavy-duty internal frames, and buying for the duration of your specific treks, you will ensure that the only thing you are feeling on the trail is the inspiration of the mountains.